Monday, December 30, 2013

diy re-finished shabby-chic dresser

so my best friend from high school got married. i thought i would be different and give them re-finished furniture - it lasts longer than a set of sheets or any other gift on their registry, plus its more personal... i got the idea from my parents house, and a piece of furniture they received as a wedding gift - they still have the piece today. i love that aspect.

so i re-did a dresser (i was so delayed on the gift that by the time i actually got to making it they were expecting their first baby. but it worked out for the best because they needed new baby furniture.) i did get it to them before they had been married for a year - so i was within the etiquette time frame standard. 

fortunately my mom was meandering st. vincent de paul by her house - its huge, the place was formerly a world market, so you can only image the size - she came across an americana style dresser - solid wood, dovetail drawers, no flaws... for $45. you cannot beat that.

i just can't believe what people give away - antique buffet (more on that later), awesome family crest glasses, silver rimmed whiskey glasses (that are now selling at some pottery barn company for $25 per glass), solid wood dining room chairs, etc.

i had some onlookers during the project - jake - he likes to supervise everything - note this is my parents dog - and he's such an odd bird, but we love him.

i started out de-glossing with Klean-Strip - "easy liquid sander deglosser" which is only to be used if you're PAINTING. do not use this if you intend on staining. this product essentially just takes the shine off of the piece and enables the paint to stick to the surface of the piece you're working on.

after deglossing we (as in the dogs and i?) wiped down the dresser with a wet cloth to make sure all of the deglosser was off of the piece. then it was time to start painting - i used valspar "minty" in a matte finish - adrienne picked out this color - as it was the most versatile for a baby's room.   a quart was more than enough - in fact there was left over which adrienne used to make some artwork for baby camille.

so i put on two coats of the valspar paint - no method to painting - just make sure it's dry in between coats. we were working in the shade, so that also helps.


dresser being painted
its easiest to paint with the drawers pulled out, so i would suggest pulling them out. you really only have to paint the fronts, so save yourself the time and paint - unless you are a top top top perfectionist. 


drawers pulled out being painted
after the paint is completely dry  in order to give it that "shabby chic" look i took 100 grit sand paper (yes a little rough) and lightly sanded the edges so get that "i've seen a lot" and "moved around a lot" and "i am loved but i can take a beating." this part is imperative to make sure the piece looks like it didn't come straight from ikea. when sanding i just think of where a piece of furniture is likely to get beat up the most - and that's on the edges and corners - especially around the top of the dresser - those corners see a lot of abuse.
all painted and sanded

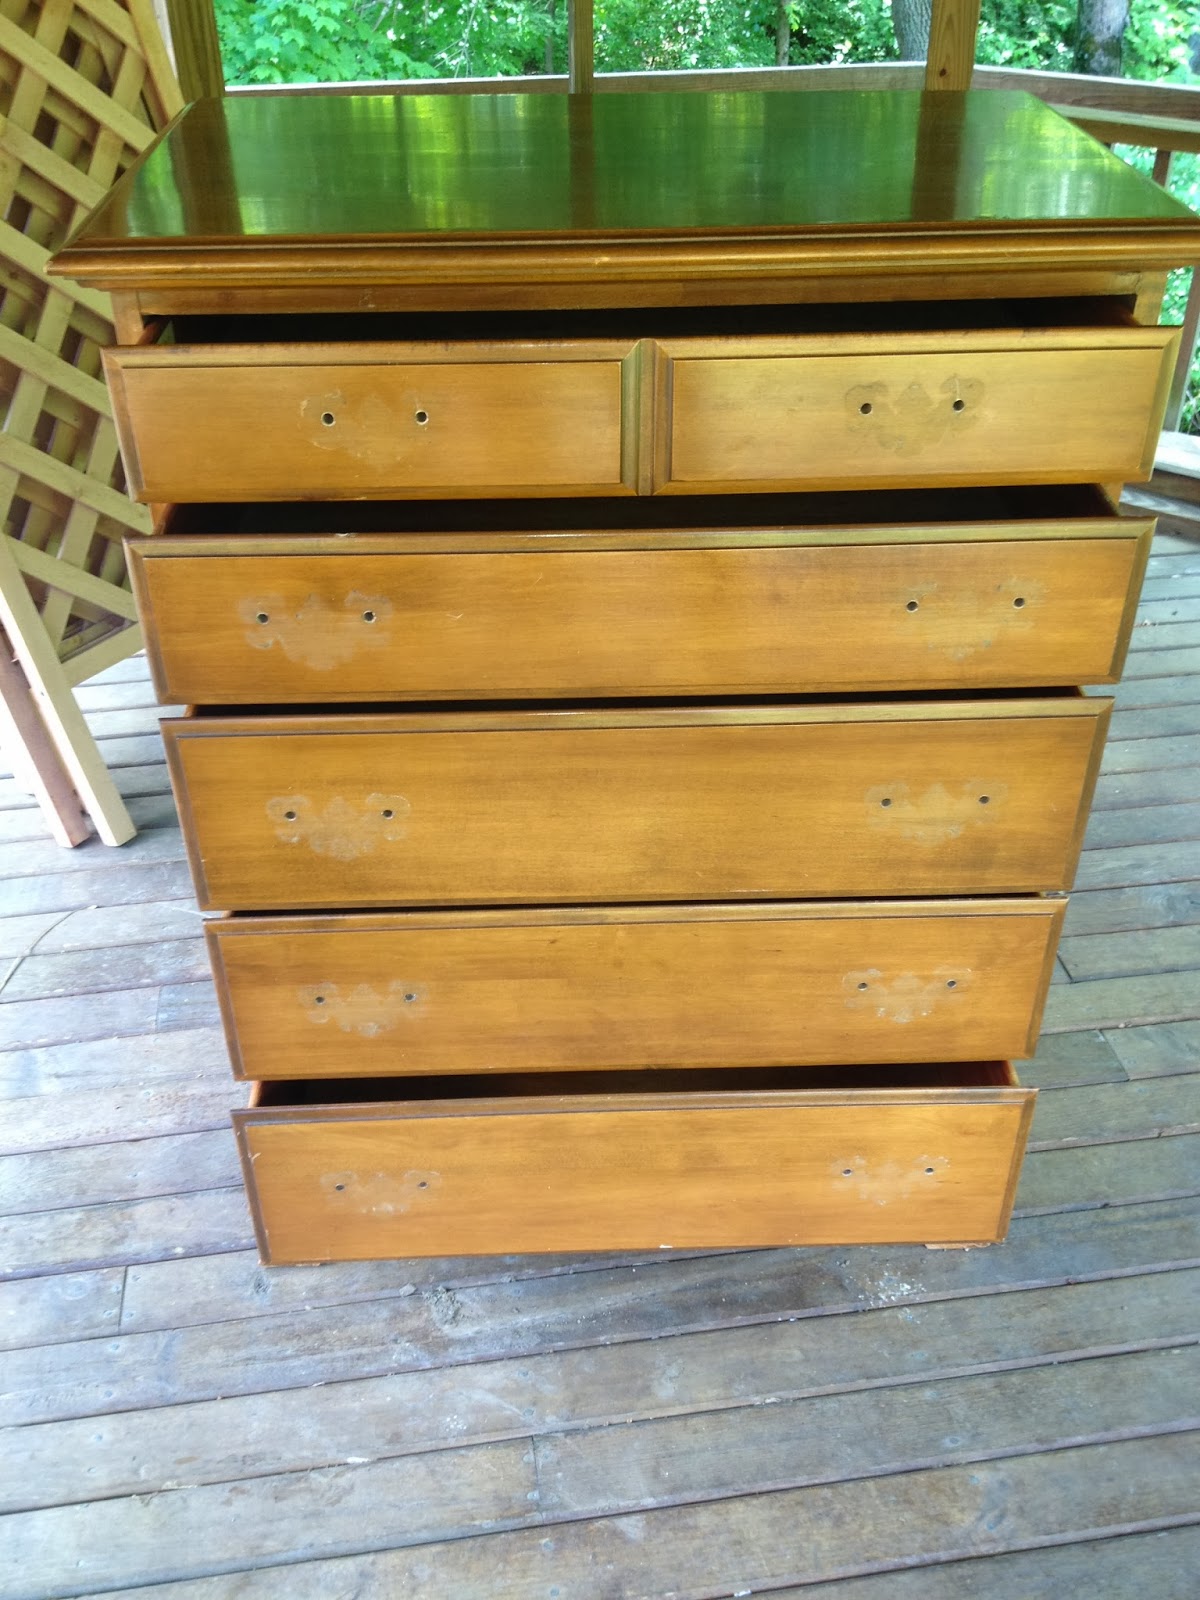
once you get the paint sanded off - wipe down your piece - make sure it is COMPLETELY free of debris. i LOVE tack clothes for this reason, they are sticky and collect everything - and there is a plethora of them in my dad's garage since he is restoring an antique wooden cruiser.

so, once it is debris free, take your stain (i went with minwax walnut), put on some gloves, and dip a rag in to the stain and start wiping it on the piece - then have a clean towel handy to really wipe down any extra stain - this will darken your color you picked a pretty good amount - it gives it that aged looked - but still allows for that pop of color.
stain on frame, not the drawer fronts


allow the stain to dry - probably about 3 hours. then you can begin adding your protective coat. since i used a latex based paint and then an oil based stain - it is in your best interest to use a water based polycrylic protective finish. I used "minwax water based polycrylic protective finish" in a "clear semi-gloss." i put 5 coats of this stuff on - no joke. the more coats you put on the longer your paint and stain will last.

the last step was finding handles. that wasn't too bad - if i would have measured each and every width between the two holes - turns out this dresser has two different handle hole width - so that issue - because i didn't measure each and every distance between the two holes - caused a little headache - but it was completed - and i was able to find two handles that were similar in style (the top drawers were the only drawers with a different distance between the two holes for the handles). so
side view of completed piece - minus the handles
completed piece - minus the handles


so i'm terrible with documenting (aka blogging my projects)

new years resolution - actually share and post my projects for  others to see.

so here is a little taste of everything zack and i have worked on this year....


scored these chairs for $47 from an estate auction - this picture doesn't even show how gross these chairs were - you would slide your hand across the frame and red sand would come of. and, i am fairly certain 2 of the cushions were filled with beans - as in you were sitting on a bean bag.

 removed the seat cushions* (saving the cushions so the dimensions can be used by the upholstery repair god when making new cushions) de-glossed, sanded and wiped down the frames all before hitting them with "antique white" spray paint.

*mom wanted to make the cushions a christmas gift, so i am letting her take them to the upholstery expert for a professional job.


for $45, zack and i installed a patio misting system around our pergola - it made the summer extra nice and the dogs just loved laying under it.


Monday, July 30, 2012

backyard remodeling

so our backyard seemed to have taken forever to update. but we are so happy with the final products (minus the sod we still have to lay over on the left side).


we started out with this.... our deck was on its last leg, it was a breeding ground for wasp and hornets and just all over ugly. granted, this is a picture prior to us buying the house, so we did clean it up a little bit and our furniture made it look better.

our project began with just wanting to rip out the deck and put a patio in where the desk use to be. however, our backyard isn't as private as we would have liked so we decided to move the patio seating area to the other side of the house where the house blocks the view to the street. so then we began ripping out the cracked sidewalk. nothing gets your anger out like take a sledgehammer to cement... great workout option too. additionally we had to cut down a tree (again, like everything else, it was in bad shape)
then came the cleanout and getting rid of 12 TONS!!! of dirt... who knew this amount of dirt existed in 400 square feet. we had to dig out about 9" all around in order to make room for 6" of limestone, 1" of sand, and the 2 3/8" pavers.

then came the limestone - it was shot in from a truck with a boom, it was pretty cool to watch. the dogs were a little confused on this pile of stone ... plus the alley cats all seemed to think it was the local litter box, unfortunately.
we spread the limestone and tried our best to ensure it was level, and the water would run away from the house and garage. 
the patio really started to take shape. we were finally ready for our screed board, sand, and pavers. we laid our line level which ran from the existing sidewalk back towards the garage, this was our check to make sure we didn't have low/high areas. this is after day one of screeding and laying pavers.
day two.
 now all we had to get was a wet saw to cut the pavers to size for the empty areas. this was generally pretty easy... just make sure to measure twice, cut once.... 
the finished patio!!! then we had the pergola to complete (plans from Ana White, Knock Off Wood - PB Weatherby Pergola) had to modify the plans for the size our 4x4 posts had already made - we had placed them prior to finding the plans.

 so now that the patio and pergola are complete we are ecstatic with our work. however, i don't think you will find me doing this much work again. it was a great experience and gave me the knowledge of how it should be done, but next time i will hire someone (and know whether they are doing it correctly)

Thursday, October 6, 2011

logistics - and a fresh start

my home (well really my zacks too) that I purchased in april 2011. this old beauty is found in newport, kentucky (right across the ohio river from cincinnati), in the east row neighborhood. built in 1889, my three story row home has a lot of quirks - questionable lighting (no switches to turn on some light fixtures), bathroom where tile takes up 75% of the wall space, and really cool old squeaky floors.
i knew that buying a home was going to be a huge undertaking, however, I didn't think there would be as many projects as there have been. this is what the home looked like right before we purchased it, so you're really getting the full start of everything.
 
i am lucky to have two really handy parents, my dad knows just about how to do anything, and if he doesn't know how to do it, he has lots of "friends" that know. my mom has an amazing knack for affordable decorating and putting everything together to make it work, her experience comes from owning two condos and having to constantly update furniture and decor because of high-use. 

anywho, there was a lot to be done right after purchasing - including moving the dirt off of the front of the house (which can cause termites), so beware, digging out some really ugly shrubs, replacing the window treatments (as you can see the former owners loved to stay with the time period of the house... not really my m.o.), painting the outside of the home (updating the color scheme, not painting the brick)... and so it begins... the endless sea of projects.